DIY Bee Frames: Build Yours Safely!
- Riley Thorne

- 1 day ago
- 6 min read
The sweet taste of honey and the satisfaction of supporting pollinators is drawing more homeowners to beekeeping. But before you can harvest golden nectar, you need a home for your buzzing tenants: the beehive. While pre-built hives are available, crafting your own bee frames offers a rewarding DIY experience and a way to customize your beekeeping journey. This complete guide will walk you through the process of how to DIY: Build bee frames safely, providing complete guides for homeowners and DIY enthusiasts. We'll cover everything from choosing the right wood to essential safety precautions, ensuring a successful and sting-free construction process.
Why Build Your Own Bee Frames?
Building your own bee frames might seem daunting, but it offers several advantages over purchasing pre-made ones. It's a great way to save money, customize the frame size to your specific hive setup, and gain a deeper understanding of the hive's inner workings.
Cost Savings
One of the most immediate benefits is the cost reduction. Pre-made frames can be expensive, especially if you're starting with multiple hives. By sourcing your own lumber and hardware, you can significantly lower the initial investment.
Customization
Pre-made frames come in standard sizes, but what if your hive is slightly different? Building your own allows you to tailor the dimensions to perfectly fit your hive body. This ensures proper bee space, critical for hive health and honey production.
Deeper Understanding
The act of building the frames yourself fosters a deeper connection with your hive. You'll learn about the different components, how they fit together, and why each element is important. This hands-on experience will make you a more informed and confident beekeeper.
Essential Materials and Tools
Before you begin your DIY project, gather the necessary materials and tools. Quality materials and the right equipment are essential for building sturdy and safe bee frames.
Lumber Selection
Choose a wood that is safe for bees and resistant to moisture. Untreated pine or cedar are popular choices. Avoid pressure-treated wood, as the chemicals can be harmful to the bees. Look for lumber that is straight, free of knots, and kiln-dried to minimize warping.
Hardware
You'll need small nails or staples to assemble the frame components. Stainless steel is the best option as it resists corrosion. Consider using foundation (wax or plastic) to give the bees a head start in building their comb.
Tools
Saw (table saw or hand saw)
Measuring tape
Square
Hammer or staple gun
Drill (optional, for pre-drilling nail holes)
Safety glasses
Gloves
Step-by-Step Guide to Building Bee Frames
Now that you have your materials and tools, let's dive into the construction process. Follow these steps carefully to ensure your frames are built correctly and safely.
Cutting the Lumber
Top bar: 19 inches long
Bottom bar: 17 5/8 inches long
Side bars: 9 1/8 inches long (for a deep frame), 6 1/4 inches long (for a medium frame) or 5 1/2 inches long (for a shallow frame)
Assembling the Frame
Apply a small amount of wood glue to the joints where the top bar, bottom bar, and side bars meet. Clamp the pieces together using a square to ensure the frame is perfectly rectangular. Once the glue is dry, secure the joints with nails or staples. Use at least two fasteners per joint for added strength.
Installing the Foundation
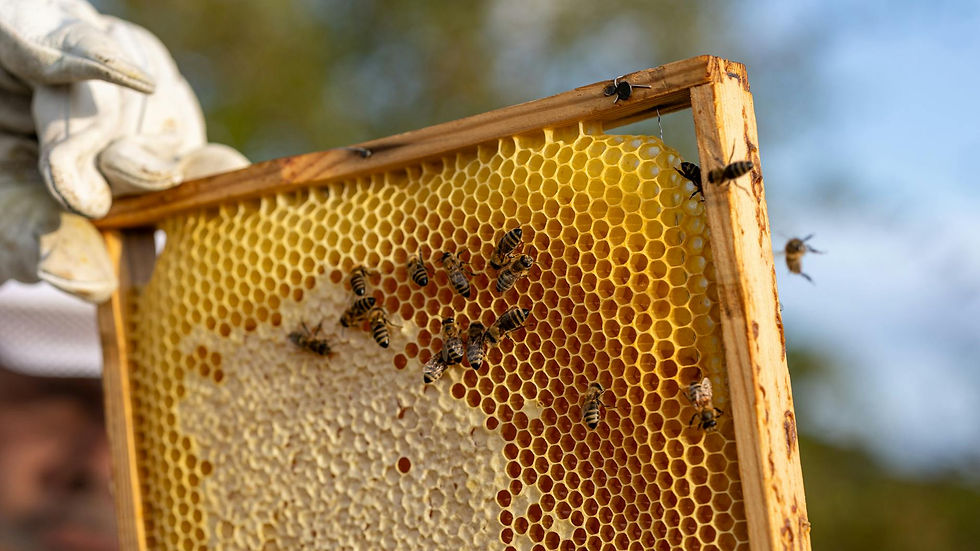
Once the frame is assembled, you can install the foundation. There are two main types: wax and plastic. Wax foundation provides a natural surface for the bees to build their comb, while plastic foundation is more durable and easier to clean. To install wax foundation, gently press it into the frame, using a wire embedder to secure it to the frame wires (if present). For plastic foundation, simply slide it into the grooves on the top and bottom bars.
Essential Safety Precautions
Safety should be your top priority when building bee frames. Power tools can be dangerous if not used properly, and even hand tools can cause injury if you're not careful.
Eye Protection
Always wear safety glasses when cutting, drilling, or hammering. Sawdust and flying debris can easily damage your eyes.
Hand Protection
Wear gloves to protect your hands from splinters and blisters. Gloves also provide a better grip on the tools and lumber.
Tool Safety
Read and understand the operating instructions for all power tools before using them. Use the correct tool for the job and never force a tool beyond its capabilities. Keep your tools clean and well-maintained.
Workspace Safety
Work in a well-lit and ventilated area. Keep your workspace clear of clutter to prevent accidents. If you're working with power tools, make sure the area is free of flammable materials.
Advanced Techniques and Considerations
Once you've mastered the basic frame construction, you can explore more advanced techniques to improve the quality and functionality of your frames.
Pre-Drilling Nail Holes
Pre-drilling nail holes can prevent the wood from splitting, especially when working with hardwoods. Use a drill bit that is slightly smaller than the diameter of the nails.
Adding Frame Wire
Frame wire provides additional support for the comb, especially in hotter climates where the wax can soften. To install frame wire, drill small holes through the side bars and thread the wire through them. Use a wire tensioner to tighten the wire and secure it in place.
Using Queen Excluders
Queen excluders are placed between the brood box and the honey supers to prevent the queen from laying eggs in the honey supers. You can build your own queen excluder frames or purchase pre-made ones.
Maintaining Your Bee Frames
Proper maintenance is essential for extending the life of your bee frames and ensuring the health of your colony.
Regular Inspections
Inspect your frames regularly for signs of damage or disease. Look for cracks, warping, or any other issues that could compromise the frame's integrity.
Cleaning and Sanitizing
Clean and sanitize your frames regularly to prevent the spread of disease. Scrape off any excess wax or propolis, and use a bee-safe disinfectant to kill any bacteria or fungi.
Replacing Damaged Frames
Replace any damaged or diseased frames immediately. A weak frame can collapse under the weight of the honey, and a diseased frame can infect the entire colony.
Troubleshooting Common Problems
Even with careful planning and execution, you may encounter some challenges when building bee frames. Here are some common problems and how to solve them.
Warped Lumber
Warped lumber can make it difficult to build straight and square frames. To avoid this, use kiln-dried lumber and store it properly in a dry place. If you do encounter warped lumber, try to straighten it using clamps or weights.
Splitting Wood
Splitting wood can occur when hammering nails or driving screws. To prevent this, pre-drill nail holes and use a light touch when fastening.
Foundation Issues
The foundation may not fit properly in the frame, or it may sag or collapse. To avoid this, use the correct size foundation for your frames and secure it properly with a wire embedder.
Benefits of Using Locally Sourced Materials
Whenever possible, opt for lumber and hardware sourced from your local community. This practice supports local businesses and reduces the environmental impact associated with long-distance transportation.
Supporting Local Economies
Buying local helps sustain local businesses and creates jobs in your community. This strengthens the local economy and promotes economic stability.
Reducing Environmental Impact
Transporting materials over long distances contributes to air pollution and greenhouse gas emissions. By sourcing locally, you can reduce your carbon footprint and support a more sustainable supply chain.
Ensuring Material Quality
Local suppliers often have a better understanding of the specific needs of beekeepers in your area. They can provide advice on the best materials to use and ensure that their products meet the highest quality standards.
Conclusion
Building your own bee frames can be a rewarding and cost-effective way to support your beekeeping hobby. By following this complete guide, you can learn how to DIY: Build bee frames safely, providing complete guides for homeowners and DIY enthusiasts. Remember to prioritize safety, use quality materials, and maintain your frames regularly to ensure the health and productivity of your bees. Building your own bee frames is a fantastic way to become more involved in the beekeeping process. You will be saving money as well as creating a better environment for your bees. So, gather your materials, put on your safety glasses, and get ready to create a comfortable and secure home for your buzzing friends. Take the first step today by gathering your materials and planning your build! Your bees will thank you for it!


Comments