Concrete Crack Repair Epoxy (The No-Drama, No-Dust Fix) 🛠️
- Mei-Lin Arora

- Sep 3
- 10 min read
Updated: Sep 13
Concrete cracks. Gravity wins, water gets petty, and your slab does the geological equivalent of side-eye.
The trick isn’t pretending cracks don’t exist; it’s choosing the right fix and doing it once, correctly. Welcome to concrete crack repair epoxy—the “glue that’s stronger than the excuse.”
We’ll cover diagnosing cracks, when epoxy beats other fillers, step-by-step application (injection and gravity-feed), finishing, safety, and the mistakes that send repairs to the Crack Fails Hall of Fame.
If overspray hit plastic, this explainer on what paint and epoxy remover does to plastic can save a handle or bezel.

Yes, this guide reads like your brutally honest friend talking you through a weekend project—with expert detail sneaked in so you actually get a professional result.
If you’re planning a garage makeover, this one-stop DIY epoxy flake garage floor guide shows prep that actually lasts.
What “Concrete Crack Repair Epoxy” Actually Does (And When Not To Use It)
Epoxy isn’t spackle. It’s a two-part thermoset resin that bonds cracked concrete back together and, once cured, is often stronger than the parent concrete. Used correctly, it restores structural continuity across a crack instead of just hiding it. For concrete crack repair, that’s a big deal.
When epoxy is a win:
Static or mostly non-moving cracks (thermal shrinkage cracks that have stabilized, structural cracks after settlement is addressed).
Concrete slab crack repair where load transfer matters: garage floors, shop slabs, warehouse slabs, basement slabs that will be coated or tiled.
Tight to moderate crack widths (hairline up to ~1/4" with the right viscosity and injection ports).
Concrete driveway crack repair when the slab has stopped moving and you want to prep for resurfacing/coating.
When epoxy is the wrong tool:
Active/moving cracks (expansion/contraction, poor control joint layout) — use flexible polyurethane or design a proper movement joint.
Water actively flowing through crack — stop leaks first, then come back with epoxy.
Heavily contaminated cracks (oil saturated) — clean aggressively or switch to other systems if bond is doubtful.
Cosmetic crazing/micro-cracks at the surface — resurfacer may be more efficient.
If you want the nerd-tier “why concrete cracks at all,” ACI’s causes/evaluation guide is the classic starting point: ACI 224.1R. PCA also has a friendly overview of cracking in concrete that keeps you out of myth territory.

Diagnose Before You Mix (No, You Can’t Just “Epoxy It and Pray”)
Crack anatomy time. This is the five-minute detective work that separates “one-and-done” from “see you next spring.”
Type — random shrinkage, settlement, heave, overload, or a control-joint crack that migrated. If it mirrors a control joint, it may just need proper joint work, not full injection.
Movement — tape a crack monitor (or simply mark edges with pencil and measure) for a few days. If it opens/closes noticeably with temp swings, epoxy may get re-cracked. Use flexible systems or re-establish a movement joint.
Width — hairline (<0.012") calls for low-viscosity (LV) epoxy; wider cracks may need paste-grade surface seal with pressure injection or sand-loaded epoxy for voids.
Pattern — map cracking (alligator), offset planes, sinking corners, or a single clean fissure. Offset planes can require stitching (dowels or carbon staples) plus epoxy.
Moisture — damp is okay for some “moisture-tolerant” epoxies, standing water is not. Dry the area or use the manufacturer’s moisture-tolerant line.
Cause fixed? — if drainage still dumps water under the slab or tree roots are bench-pressing your driveway, the crack is a symptom. Solve the cause first.
For deeper repair theory and options, the federal-level Concrete Repair Manual is still a tank of knowledge: U.S. Bureau of Reclamation Concrete Repair Manual.
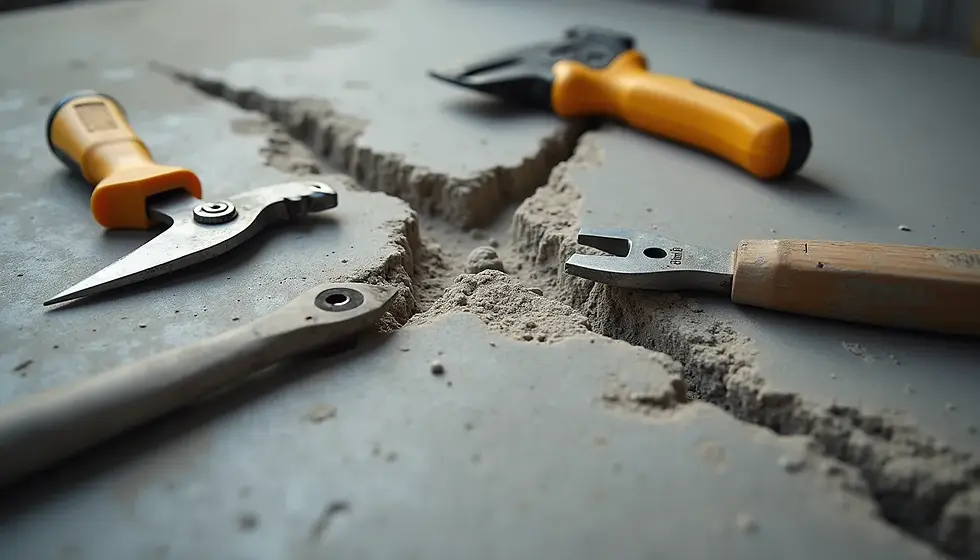
Materials & Tools (A Short List That Matters)
Epoxy system
Low-viscosity injection epoxy (for hairline to ~1/8").
Gel or paste epoxy (for surface sealing and larger voids).
Cartridge set with static mixers or meter-mix setup.
Injection ports (surface-mount ports or drilled packers).
Prep and finishing
Angle grinder with crack-chasing blade (if routing is specified).
Wire brush, shop vac, compressed air (oil-free).
Solvent wipe (manufacturer-approved) and lint-free rags.
Sand (clean, dry 20/30 or 30/50) if bulking/bridging is needed.
Margin trowel, putty knife, painters tape.
PPE & safety
Nitrile gloves, eye protection, sleeves.
Respiratory protection when grinding (read OSHA silica in construction).
Ventilation for interior work.
Don’t bargain-bin these: the epoxy (ASTM C881 compliance is a good sign), ports, and mixers. If the spec sheet references ASTM C881 you’re in grown-up territory; if it reads like a mystery glue with no data, hard pass.
Prep: The Most Boring Step (Also the One That Decides Everything)
Great epoxy on a dirty crack is lipstick on a pothole. Your success rate depends on prep.
Clean the surface. Vacuum, brush, and blow out loose dust. If oil contamination is present (driveways, garages), use a degreaser and rinse/dry thoroughly. Repeat until a white rag comes up clean.
Open it up (if specified). For routing & sealing, widen the crack to ~1/4" V-groove with a crack chaser. For injection, surface-mount ports can work with no routing; drilled packers need angled holes crossing the crack.
Dry what must be dry. If the product isn’t moisture-tolerant, run fans or gentle heat. No standing water.
Mask edges. Painter’s tape saves your finish (and your patience).
Set a test. Mix a small batch, wet a small area—watch for rejection (“fish-eyes”) which means contamination remains.
Pro-level detail: bond strength depends on sound concrete. If the edges crumble under light scraping, you’re gluing to cornflakes. Chip back to solid paste and aggregate.

Method 1 — Injection (How to Repair Cracks in Concrete Like You Mean It)
This is the structural method—ideal for slabs, walls, and load paths. It sounds fancy; it’s just methodical.
1) Choose the viscosity.Hairlines want low-viscosity epoxy (as thin as syrup). Wider cracks may take medium LV or require staged gel + LV.
2) Install ports.
Surface ports: space 6–12" apart along the crack; sit them on gel epoxy “pucks.”
Drilled packers: drill at 45° to intersect the crack mid-depth, 6–12" spacing; install mechanical packers.
3) Surface seal.Trowel gel epoxy over the crack between ports (1–2" wide, 1/16–1/8" thick). Seal any side branches you see. Let it set to the manufacturer’s “tack-free but green” stage.
4) Mix smart.Follow the ratio. Warm resin = faster cure. Cold resin = molasses. Keep cartridges warm but not hot (room temperature sweet spot). Abandon any cartridge that sets in the nozzle—start a fresh mixer.
5) Inject from the lowest port upward (or one end to the other for horizontal slabs).
Slow, steady pressure.
When epoxy shows at the next port, cap the current one and move forward.
Keep feeding until refusal (the crack won’t take more).
Watch for leaks and patch them with gel immediately.
6) Post-fill.After the line “drinks,” go back and give each port a top-off. Concrete is thirsty and will accept a little more after internal wetting.
7) Cure.Follow the pot life/ambient temperature chart. Protect the area from traffic and curious pets who assume shiny things are for stepping.
8) Remove ports and surface seal.Pop surface ports off with a twist, then shave/abrade the gel flush. Drilled packers back out with a wrench. Feather-grind and, if aesthetics matter, touch up.
Result: the crack is now a bonded plane. If you need heavy-duty stitching, install carbon-fiber staples or dowels before or during the injection sequence per the manufacturer design.
Method 2 — Gravity-Feed / Routing & Sealing (Driveways Love This)
When the crack is accessible from above and not actively moving, a gravity-feed or routed V-groove + epoxy fill is quick and tough—perfect for concrete driveway crack repair and many concrete slab crack repair scenarios.
1) Chase the crack (if needed).Cut a 1/4" V-groove along the crack. Vacuum everything like your security deposit depends on it.
2) Dry fit and mask.Tape both sides to keep edges crisp.
3) Mix a low-viscosity or medium-viscosity epoxy.Some installers add a small amount of clean, dry sand to build body for wider grooves—do not turn it into paste unless the spec allows.
4) Flood the groove.Pour or syringe epoxy along the crack, letting capillary action draw resin deep. Add in passes; don’t create a lake.
5) Top up, as it settles, add more until slightly proud of the surface.
6) Skim and de-air.Light passes with a trowel pop bubbles. Heat guns are for paint, not epoxy; resist the urge.
7) Cure, then flush-grind.Feather grind to level with surrounding concrete. You now have a dense, bonded line ready for coating, sealing, or just living its best life unsheltered.
Pro move: if the driveway goes through freeze-thaw cycles and shows seasonal motion, use flexible joint sealant at control joints and save epoxy for non-moving structural cracks.
Temperature, Humidity, and Pot Life (The “Chemistry Is Real” Section)
Ambient sweet spot: 60–80°F. Colder slows cure and raises viscosity; warmer speeds cure and can shorten working time to “blink and it’s gel.”
Substrate temperature matters. Cold slabs chill epoxy on contact. Warm cartridges in a room, not on a heater.
Mixing: scrape the sides and bottom; with cartridges, purge a small amount to ensure proper mixing before starting on the crack.
Pot life: if the cup gets hot, it’s done. Spread mixed epoxy out in a flat tray to slow exotherm.
Recoat windows: if you’re coating or overlaying later, hit the recoat window or sand to a tooth for mechanical bond.
The Concrete Repair Manual goes deep on environment, bond, and cure profiles if you want the full science: USBOR Concrete Repair Manual.
Finishing and Aesthetics (Because You Don’t Want a Racing Stripe)
Grind flush with a 4–5" grinder and a fine diamond cup after cure.
Feather edges so the line visually disappears under sealer or coating.
Color matching is limited; epoxy cures glossy then dulls. If color matters, plan a uniform finish (tinted sealer, paint, epoxy floor, or microtopping).
Safety: Eyes, Skin, Lungs, Dignity
Gloves always; epoxy likes to shake hands and never let go.
Eye protection; splashes happen at ports under pressure.
Ventilation; most epoxies have low odor, but “low” isn’t “none.”
Grinding = dust; that’s crystalline silica. Use extraction and the PPE spelled out here: OSHA silica in construction.
Common Mistakes (And How to Dodge Them Like a Pro)
Active crack + rigid epoxy = re-crack. Decide if it needs flexibility or a movement joint.
Dirty, oily substrate. Degrease, rinse, dry, test with a white rag.
Wrong viscosity. Hairlines need LV; paste won’t magically ooze in.
No surface seal for injection. You’ll just decorate the floor with expensive drips.
Ports too far apart. The crack won’t wet out; stay in the 6–12" range.
Overpressure. Slow injection wins; otherwise you open side channels and lose resin.
Skipping cure times. If it says 8 hours at 70°F, that’s not a dare.
Grinding too soon. You’ll tear. Wait for full cure.
Coatings, Sealers, and “What Can I Put Over It?”
Epoxy floors, polyaspartic, urethane topcoats: bond beautifully to cured, sanded repair lines.
Acrylic sealers: fine for driveways; just let the repair cure and lightly scuff if required.
Tile/stone: epoxy-repaired cracks can be covered; decouple if slab movement is suspected (membrane per tile standard).
Asphalt overlay on concrete? Don’t. Wrong playbook.
FAQ
What is concrete crack repair epoxy?A two-part structural resin that bonds cracked concrete back into one piece. Unlike caulk, it restores strength across the crack once cured.
How to repair cracks in concrete with epoxy?Clean, install ports, surface-seal, inject low-viscosity epoxy at low pressure until refusal, top up, cure, remove ports, and grind flush.
Concrete driveway crack repair with epoxy?Route a V-groove, clean, gravity-feed low/medium-viscosity epoxy in passes, top up, cure, and grind flush. Use flexible sealant at movement joints.
What cracks should not get epoxy?Active/moving cracks, leaking cracks (fix leaks first), oil-soaked cracks that won’t clean, and hairline crazing where resurfacing is smarter.
What size duct… wait, wrong project. How long does epoxy cure?Most structural epoxies set within hours and reach functional cure in 24–72 hours, depending on temperature and product.
Is epoxy permanent?If the cause is solved and the crack is non-moving, yes—epoxy bonds can outlive the slab around them.
Do I need ASTM C881 epoxy?It’s a solid quality marker for structural use. Look for conformance on the technical data sheet: ASTM C881 overview.
Cost, Time, and Expectations (Reality, Served Neat)
Material cost: $40–$150 in epoxy for a typical residential crack line; ports/sealants add modestly.
Tools you likely already own: grinder, vac, drill/driver.
Time: a single crack can be fully injected in an afternoon; next day you’re grinding flush.
Durability: epoxy doesn’t “peel out” like caulk; it becomes part of the slab. The only thing that beats it is a moving crack or new structural movement.
Maintenance and Monitoring (Because Slabs Love Drama)
Walk the slab seasonally. If a repaired line ever reopens, check drainage or load changes.
Seal exterior concrete every 2–3 years to keep water out of new micro-cracks.
Keep joints clean and filled with flexible sealant so concrete cracks where it’s supposed to: in the joint, not randomly through your lifegoals.
Case Playbooks (Real-World Scenarios)
Basement slab hairlines, no movement
LV epoxy injection or gravity-feed.
Grind flush.
Coat or leave natural.
Garage slab crack under a lift
Injection + carbon staples across the crack every 12–24".
LV for penetration, gel for top-off.
Grind flush and install an industrial coating.
Concrete driveway crack repair after freeze-thaw
Address drainage first.
Route and fill with epoxy if the slab is stable; maintain flexible sealant at joints.
Consider a breathable sealer for freeze-thaw defense.
Structural wall crack, minor seepage
Stop leaks with a fast-set leak-stop material.
Inject moisture-tolerant epoxy.
If the crack is tied to foundation movement, fix the movement cause first (soil/drainage).
Advanced Moves (If You Want Bonus Points)
Stitching: add carbon-fiber staples/dowels across the crack to enhance load transfer.
Sand-broadcast top: while the surface epoxy is still tacky, broadcast dry sand and later vacuum—creates a perfect tooth for coatings.
Thermal pre-game: warm the slab slightly (safely) to reduce viscosity at the interface and improve penetration, then let it cool to pull epoxy inward as it contracts.
Concrete Slab Crack Repair vs. Cosmetic Filler (Choose Your Fighter)
Epoxy = structural bond. Choose for load paths, slabs you’ll coat, or anything you want “as one piece” again.
Polyurethane/latex = movement accommodation and weathering tolerance. Choose for joints, moving cracks, and exterior seasonal motion.
Cementitious patch = surface profile and filling spalls, not glue. Often used after epoxy to rebuild missing paste at the surface.
If you take nothing else from this rant: choose by crack behavior, not just “what’s on sale end-cap in aisle 12.”
Concrete Crack Repair Epoxy: Field Checklist (Print This)
Cause addressed (drainage, movement, load).
Crack type verified (non-moving for epoxy).
Clean, dry, sound substrate confirmed.
Ports installed 6–12" apart; surface sealed.
Correct viscosity chosen and mixed to spec.
Injected from one end/lowest point to refusal.
Top-off pass complete; cure time protected.
Ports removed; surface gel shaved; grind flush.
Optional stitching or sand-broadcast done.
Sealer/coating plans aligned with recoat window.
Conclusion — Concrete Crack Repair Epoxy That Actually Works 😅
Here’s the bottom line: concrete crack repair epoxy is the adult choice when you need to make a cracked slab whole again. Diagnose the crack, fix the cause, and then choose the right method—how to repair cracks in concrete by injection for structural continuity or gravity-feed/routing for accessible surfaces.
For concrete driveway crack repair, stabilize first and fill correctly; for concrete slab crack repair, use the viscosity and port spacing that actually wets the crack from end to end. Keep it clean, cure it fully, and protect the line with smart sealing or coatings. Do that, and those cracks go from “trip hazard” to “barely a story you tell once.”


Comments